
Been thinking of switching from Spotify but I’ve heard there isn’t any way to upload local files, is this true? for me, this is a dealbreaker because I have ~500 songs in my local files.
Enjoying local files is a powerful and popular feature that music streaming apps now offer. Major service providers like Spotify and Apple Music allow you to upload your local files for listening on the app. With this function, you can easily access your local audio files and better manage your music library as well. However, many people have doubts like: Can I upload music to Tidal? How to upload music to Tidal?
For all your puzzles, this guide will share useful information and tips to offer you the best listening experience on Tidal. Check out below!
Part 1. Can I Upload Music to Tidal?
Tidal is an excellent music streaming app that offers superior audio quality for its users. Audiophiles can listen to Hi-resolution sounds with up to 1411 kbps audio files by signing up for a Premium subscription. Well, it’s common. Nowadays, we use more than one music streaming app for multiple reasons. When you have large amounts of local songs, it would be great to have them together in one music player or app. To get this done, you’re about to upload songs to Tidal. Does Tidal have a local files option? Luckily, the answer is yes.
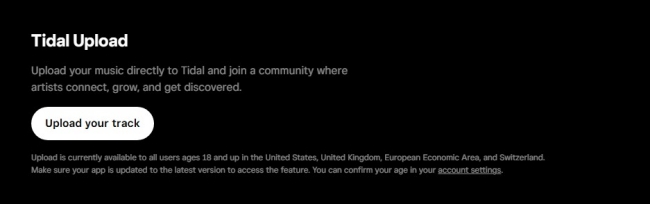
Tidal used not to support the feature of uploading local music, which is a pity and inconvenient for users. However, Tidal finally released this feature at the end of 2025. The Tidal Upload feature is currently available for all users who age 18 and up in the U.S., U.K, European Economic Area, and more. Just make sure you have the Tidal app installed on your device to the latest version, and you can access this feature easily. We have prepared a step-by-step guide that helps you upload music to Tidal in Part 3. If you’re unsure about this feature, you can keep reading to get more detailed information about it.
Part 2. New Tidal Upload Feature: Everything You Should Know
Lately, Tidal has introduced a significant update to its platform with the new Tidal Upload feature, allowing users directly upload their music and share it with others. In this section, we will cover everything you need to know about the new Tidal Upload feature, from how it works to its limitations. Let’s break it down together.

What Can You Upload to Tidal?
Tidal allows you to upload your own original audio tracks. Once uploaded, you can play and share them. Currently, Tidal supports files in WAV, FLAC, AIFF, ALAC, MP3, AAC, and M4A formats. Here’s what you can do with Upload:
- Upload audio tracks or material you own all the necessary rights to.
- Play and share your uploaded tracks within the Tidal app or its web player.
- Edit the details of your uploaded tracks, including the cover, title, artist name, and release year.
- View how many users have listened to your tracks when you share them.
What Are the Limits of Tidal Upload?
Tidal Upload limits each user to uploading up to 200 tracks, and each track you upload should be up to 5GB in size. You should notice the limits may change as Tidal improves this feature. What counts most is that you can’t upload any third-party copyrighted material. Otherwise, you will see a copyright flag on your uploaded songs, and you may receive a DMCA notice.

What Happens after You Uploaded a Track?
Once you upload your music, it will appear on the track list page. By default, it is set to Share on Tidal, which means others listeners (both free and Premium users) can see it on your profile and search it for streaming. If you want to keep this track private, you can toggle off the Share on Tidal option before uploading.
In addition, there will be a play icon showing your streams and a headphone icon showing the listeners of your tracks from the past 30 days.
How to Edit Track Details after Uploading
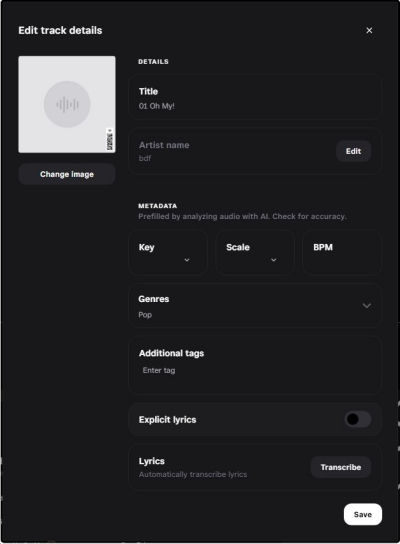
After uploading a music file, you can edit its details as you wish, including title, artist name, and other metadata. Here’s how to do it:
Step 1. Hover the cursor over your uploaded track, and then click the More icon.
Step 2. Then, click Edit track details.
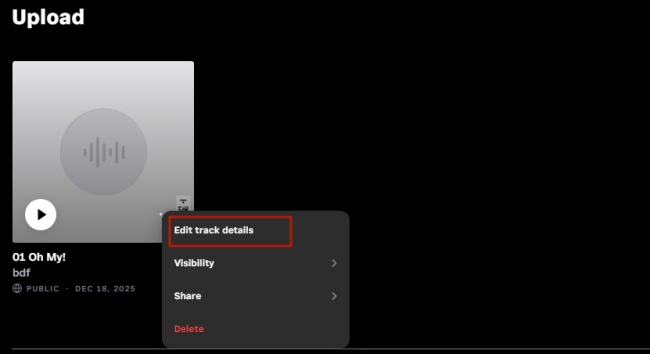
Step 3. In the new pop-up window, you can edit whatever you want. Once finished, click the Save button to save your changes.
How to Share Your Uploaded Tracks with Others
If you want to share your uploaded songs with others, you just need to tap the three dots icon next to the track. Then, select Copy link and send the music link on other apps. Anyone can listen to your song via this link. Tidal subscribers can even save this song to their Collection for later access.
How to Delete a Track You Uploaded
All the uploaded songs on Tidal can be deleted anytime you want. Just click the three dots icon next the song you want to delete, and then select Delete so that you can remove it completely.
Part 3. How to Upload Music to Tidal
With the Upload feature, uploading your music to Tidal has never been easier. Whether you are using the Tidal official app or the web player, you can easily get full control over your music files on Tidal. Follow these simple instructions:
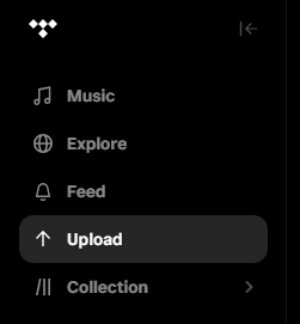
Step 1. Open the Tidal app on your device and sign in to your accounts. Then, you can select Upload in the left toolbar.
Step 2. Alternatively, you can visit the Upload page on your browser directly and select Upload your track.
Step 3. Select the Upload button. You can select the file you want to upload.

Part 4. How to Add Music to Tidal via Online Tools
When there is no official method, users also find many third-party methods to upload music to Tidal. You can also utilize these workarounds and tools in the market. If you have made purchases to get many MP3 songs stored in your local drive, the easiest way to import them to your Tidal music library is use some online transfer tools. You can pick anyone that is reliable. Here, we will take MusConv as an example:
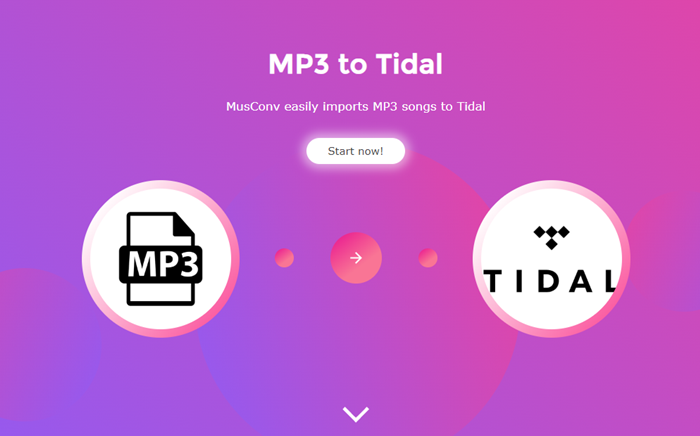
Step 1. Type in “Import MP3 to Tidal” to search for MusConv in any browser. Or you can go to musconv.com/mp3-to-tidal/ directly.
Step 2. Here on this page, click Start now to move your local MP3 files to Tidal.
Step 3. Select MP3 as the source channel and navigate to the folder where your MP3 local files are stored.
Step 4. In the “Playlists” tab, select the playlists you want to transfer and click “Transfer”.
Step 5. Finally, select Tidal as the destination service.
Now just wait and have a cup of tea, all this can be done on this online website. You don’t need to install extra apps. All you need to do is sign in to your Tidal account and follow the on-screen instructions to enable it.
Part 5. Bonus: How to Download Tidal Music Locally
Apart from uploading your local music files to the Tidal library, there is another method ensuring you can listen to your favorite Tidal music with local music together - downloading your favorite Tidal music locally. However, it can be a little tricky to do so, since Tidal Music files are all strictly protected by DRM, which restricts them from being playable on other platforms. If you want to keep Tidal downloads playable and offline accessible on your devices, TunesMake Tidal Music Converter is what you need.
TunesMake Tidal Music Converter is specially designed for all Tidal users to stream Tidal Music on multiple devices without limits. With advanced and innovative technology, TunesMake allows you to remove the DRM format from Tidal and download them locally. TunesMake Tidal Music Converter is able to download and convert Tidal music to FLAC, MP3, AIFF, WAV, M4A, and WAV. And it can handle the conversion of Tidal songs at a 22× faster speed. What’s more, it can keep the original sound quality and ID3 tags. Here is the tutorial you can follow:

TunesMake Tidal Music Converter –
Download Tidal Songs Locally to Keep Forever
- Download any Tidal content, including songs, albums, playlists, and artists
- Convert Tidal music to MP3, FLAC, AIFF, WAV, M4A, and M4B
- Preserve a whole set of ID3 tag information in the downloaded Tidal songs
- Handle the conversion of Tidal music up to 22X faster speed and in batch
Security Verified. 100% Clean & Safe.
Step 1
Select Tidal Songs to Download
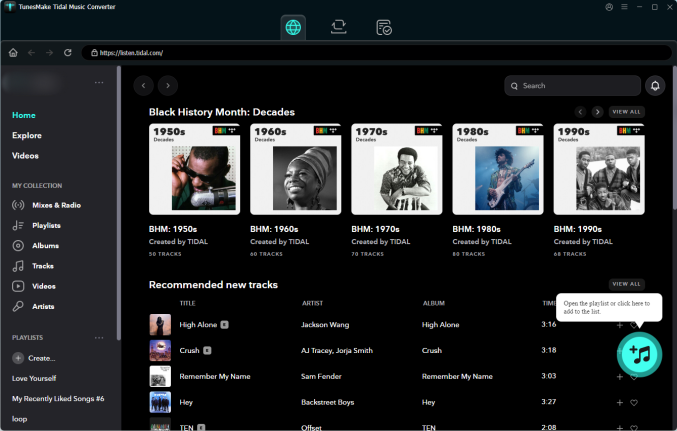
After installing, you can launch the TunesMake Tidal Music Converter on your computer and navigate to the Tidal web player. Log in to your account, and then find any playlist or album you want to save locally. Simply enter the playlist or album, and click the Add icon at the bottom. Therefore, the TunesMake program will begin analyzing it automatically. When it is finished, you can pick all the songs you like and load them to TunesMake’s conversion list by clicking the Add to List.
Step 2
Adjust Output Audio Parameters
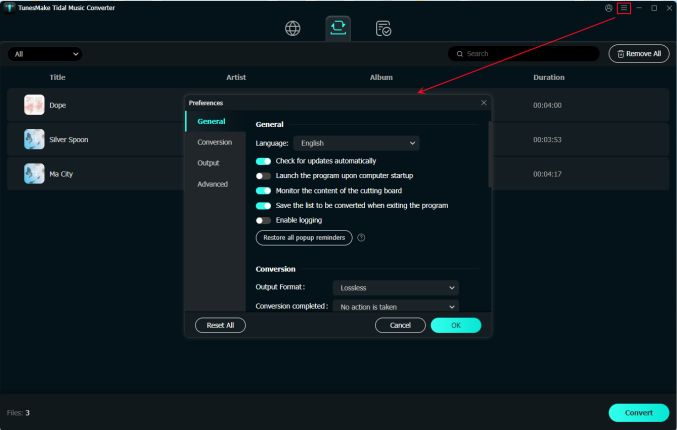
The second step is to configure the output audio parameters as you want. Go to the menu icon > Preferences > Conversion to select the output format, bit rate, sample rate, and channel for personal needs. Here you can choose MP3 to convert as it is compatible with most popular players or devices.
Step 3
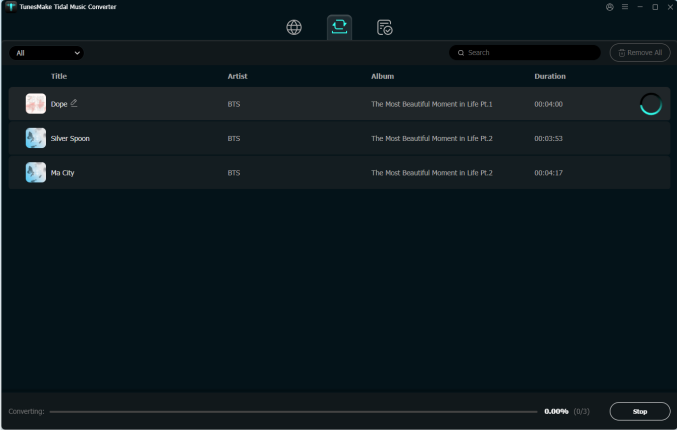
Convert Tidal Music to MP3
Once confirmed your output settings, you can click the Convert button to start your conversion. The converted Tidal music will be saved to the default folder or the folder you’ve set above. Finally, you can click the Converted icon to open the history list, where you can browse the converted Tidal music.
In Conclusion
Can Tidal add local files? Unfortunately, you cannot upload music to Tidal since the official approach to uploading no longer works. But that is not a big deal because you have so many ways to achieve your goal. You can either move MP3s to Tidal through online tools or transfer from streaming services to Tidal by TunesMake Music Converters. Of course, it’s okay to keep Tidal Music as offline playable files after converting through TunesMake Tidal Music Converter.
Related Articles


A senior editor from TunesMake, dedicated to sharing professional tutorials and solutions of software, movies, and music.
- 1
- 2
- 3
- 4
- 5
- 6
- 7